> ## Documentation Index
> Fetch the complete documentation index at: https://enterprise-docs.bglobale.com/llms.txt
> Use this file to discover all available pages before exploring further.
# Setting the Look and Feel
## Customizing Your Return Portal Look & Feel
The **Look and Feel** settings let you configure the following:
* Layout and margins
* Fonts and colors
* Behavior and display options
* Background elements
This guide describes how to access the Return portal and modify your page’s **background elements**, as shown in the following video:
## Logging in to the Return Portal
To begin modifying your background elements, you must log in to the Return portal.
1. Navigate to the Return Portal login page.
2. Enter your credentials and click **LOG IN**.
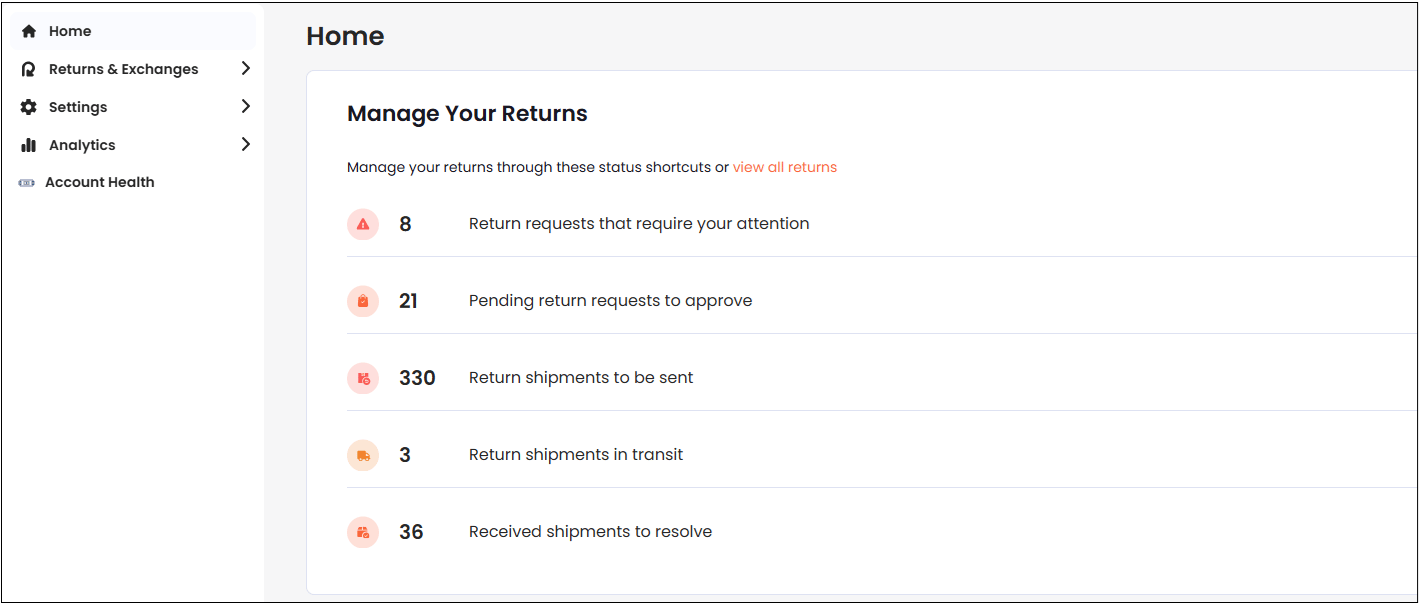
The Home screen is displayed.
 ## Accessing the Background Elements
The **Background** settings let you customize various page background elements, such as color, font, and opacity. You can do this by selecting to use either a color or image as your background and then making all needed customizations.
1. Navigate to Settings > Portal > Look and Feel.
2. Click **Return Portal**.
3. Click **Backgrounds**.
4. Customize one of the following:
* [Page background](/setting-the-look-and-feel-469195#customizing-your-return-portal-look---feel-469195)
* [Portal background](/setting-the-look-and-feel-469195#customizing-your-portal-background-469195)
* [Secondary background](/setting-the-look-and-feel-469195#customize-your-secondary-background-469195)
* [Stroke lines](/setting-the-look-and-feel-469195#customizing-your-stroke-lines-469195)
* [Shadows](/setting-the-look-and-feel-469195#customizing-your-shadows-469195)
* [Cover image](/setting-the-look-and-feel-469195#adding-a-cover-image-469195)
## Customizing your Page Background
The **Page background** section lets you customize your page background settings, which are applied to each page on your portal. A sample screen is displayed to the right of the customization menus, as shown in the figure below:
## Accessing the Background Elements
The **Background** settings let you customize various page background elements, such as color, font, and opacity. You can do this by selecting to use either a color or image as your background and then making all needed customizations.
1. Navigate to Settings > Portal > Look and Feel.
2. Click **Return Portal**.
3. Click **Backgrounds**.
4. Customize one of the following:
* [Page background](/setting-the-look-and-feel-469195#customizing-your-return-portal-look---feel-469195)
* [Portal background](/setting-the-look-and-feel-469195#customizing-your-portal-background-469195)
* [Secondary background](/setting-the-look-and-feel-469195#customize-your-secondary-background-469195)
* [Stroke lines](/setting-the-look-and-feel-469195#customizing-your-stroke-lines-469195)
* [Shadows](/setting-the-look-and-feel-469195#customizing-your-shadows-469195)
* [Cover image](/setting-the-look-and-feel-469195#adding-a-cover-image-469195)
## Customizing your Page Background
The **Page background** section lets you customize your page background settings, which are applied to each page on your portal. A sample screen is displayed to the right of the customization menus, as shown in the figure below:
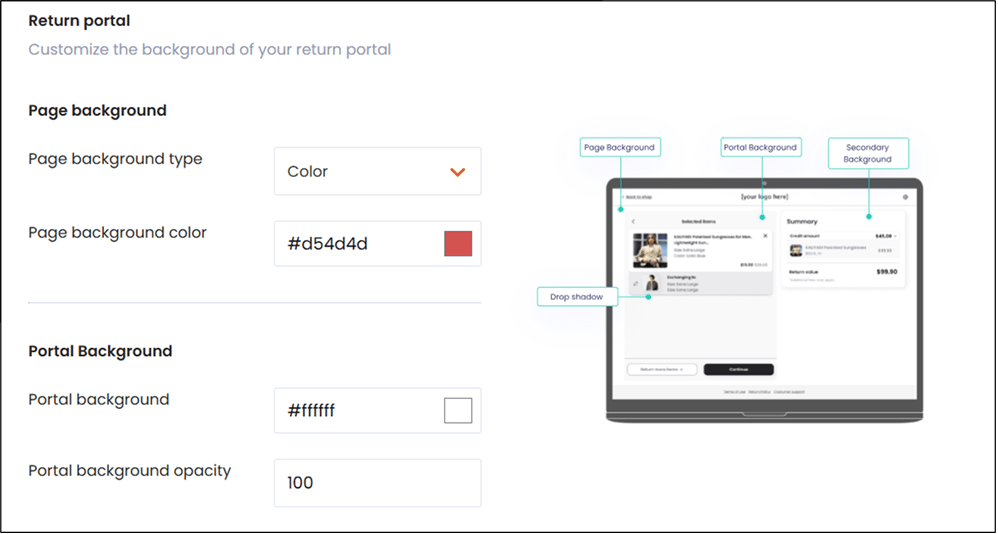 1. Scroll to the **Backgrounds**section.
2. In the **Page backgrounds** region select one of the following:
* Color
* Image
3. If you selected **Color**, do the following:
1. Select **Color** from the Page background type menu.
2. Select a color from the Page background color menu.
4. If you selected **Image**, do the following:
1. Attach an image located on your hard drive from the Page background image field.
2. Set the Page background size.
## Customizing your Portal Background
The**Portal Background** settings customize the primary background color and opacity of your entire portal.
1. Scroll down to the **Portal Background** section.
2. In the **Portal background** menu, set a color.
3. In the **Portal background opacity** menu, set an opacity level.
## Customize your Secondary Background
The **Secondary Background** settings customize the secondary background color and opacity of your entire portal.
1. Scroll down to the **Secondary Background** section.
2. In the **Secondary background** menu, set a color.
3. In the **Secondary background opacity** menu, set an opacity level.
## Customizing your Stroke Lines
The **Stroke Lines** settings let you customize the stroke line colors.
1. Scroll down to the **Stroke Lines** section.
2. In the **Stroke / line color**menu, set a color.
## Customizing your Shadows
The **Shadows** settings customize the shadow settings.
1. Scroll down to the **Shadows**section.
2. In the **Popup overlay** section, set a color.
3. In the **Popup overlay opacity** section, set an opacity level.
4. In the **Drop shadow** section, set a shadow color.
5. In the **Drop shadow opacity** section, set a shadow opacity level.
## Adding a Cover Image
The **Cover Image** section lets you add a cover image. This is the image displayed on the main screen of the portal.
1. Scroll down to the**Cover Image** section.
2. Upload an image from your hard drive.
3. The image preview is displayed.
Follow these guidelines for optimal results:
* **Minimum image size**: 500px width and 456px height
* **Maximum file size**: 400KB
* **Supported formats**: .jpg, .png, .WebP
1. Scroll to the **Backgrounds**section.
2. In the **Page backgrounds** region select one of the following:
* Color
* Image
3. If you selected **Color**, do the following:
1. Select **Color** from the Page background type menu.
2. Select a color from the Page background color menu.
4. If you selected **Image**, do the following:
1. Attach an image located on your hard drive from the Page background image field.
2. Set the Page background size.
## Customizing your Portal Background
The**Portal Background** settings customize the primary background color and opacity of your entire portal.
1. Scroll down to the **Portal Background** section.
2. In the **Portal background** menu, set a color.
3. In the **Portal background opacity** menu, set an opacity level.
## Customize your Secondary Background
The **Secondary Background** settings customize the secondary background color and opacity of your entire portal.
1. Scroll down to the **Secondary Background** section.
2. In the **Secondary background** menu, set a color.
3. In the **Secondary background opacity** menu, set an opacity level.
## Customizing your Stroke Lines
The **Stroke Lines** settings let you customize the stroke line colors.
1. Scroll down to the **Stroke Lines** section.
2. In the **Stroke / line color**menu, set a color.
## Customizing your Shadows
The **Shadows** settings customize the shadow settings.
1. Scroll down to the **Shadows**section.
2. In the **Popup overlay** section, set a color.
3. In the **Popup overlay opacity** section, set an opacity level.
4. In the **Drop shadow** section, set a shadow color.
5. In the **Drop shadow opacity** section, set a shadow opacity level.
## Adding a Cover Image
The **Cover Image** section lets you add a cover image. This is the image displayed on the main screen of the portal.
1. Scroll down to the**Cover Image** section.
2. Upload an image from your hard drive.
3. The image preview is displayed.
Follow these guidelines for optimal results:
* **Minimum image size**: 500px width and 456px height
* **Maximum file size**: 400KB
* **Supported formats**: .jpg, .png, .WebP