

- Global‑e Merchant ID: The ID of your Global‑e account
- Global‑e Merchant GUID: A GUID number for your Global‑e account. Note that Global‑e sends you a different GUID for staging and production. Make sure to use the correct GUID.
- In addition, Global‑e sends you a URL to download the installation files via Bitbucket.
- Your Bitbucket account.
- The features you want Global‑e to support: the list of countries and special features such as Fixed Prices, multiple sites, and more.
| Description | Responsibility | |
|---|---|---|
| Step 1 | Sandbox: Prepare a sandbox with your site for testing purposes. Send us the URL of your sandbox. Send us Admin permissions and credentials for:Your SandboxYour siteYour Backoffice: Products, Orders, and Promotions. Note: You may need to whitelist Global‑e IPs. Notifications Whitelist your network notifications: Obtain Global-e’s IP range and use it to configure your network security settings to accept the Global-e notifications. For each merchant website, request that Global‑e configures where notifications should be sent.Note that Global‑e calls: <merchant_site>/globalerest/* (multiple endpoints) | Merchant |
| Step 2 | Install and configure the Global‑e Add-on: Download the Global‑e Add-on and install it in your sandbox using Recipe or by performing the installation manually. See Installation. Open the local.properties file and add your merchant credentials (GUID and Merchant ID). See Configure the Global‑e Add-on.Configure additional settings, as required. See Additional Settings. | Merchant |
| Step 3 | **Storefront settings:**Make sure that the order history (My Account page) displays Global‑e’s international prices correctly to customers. See My Account. | Merchant |
| Step 4 | Solve possible issues arising after installation. | Global‑e and Merchant |
| Step 5 | Global‑e enables and manages Global‑e countries, price conversion, and Global‑e checkout. The Add-on runs the following APIs automatically when the relevant action is triggered: SendOrderToMerchant: transfers new orders from Global‑e to SAP/Hybris. PerformOrderPayment: Notifies the merchant that the payment was authorised. UpdateOrderShippingInfo: Updates the order status and status history and updates the shipping addresses. UpdateOrderStatus: Updates the Hybris order status according to data from Global-e to notify the merchant of any change made to an order (such as cancellation, status change, and more…) You can create listeners for these events. | Global‑e |
- Discover the Bespoke Functionality.
- Price Settings and Price Conversion
- Merchandising: Promotions, Restricted and Forbidden Products.
- Managing Orders
- Cart and Checkout
- In-Depth: Discover the Global‑e Add-on extensions and implement custom functionality
- Known Limitations
Integration Flows
End-to-end Flows (High-Level)
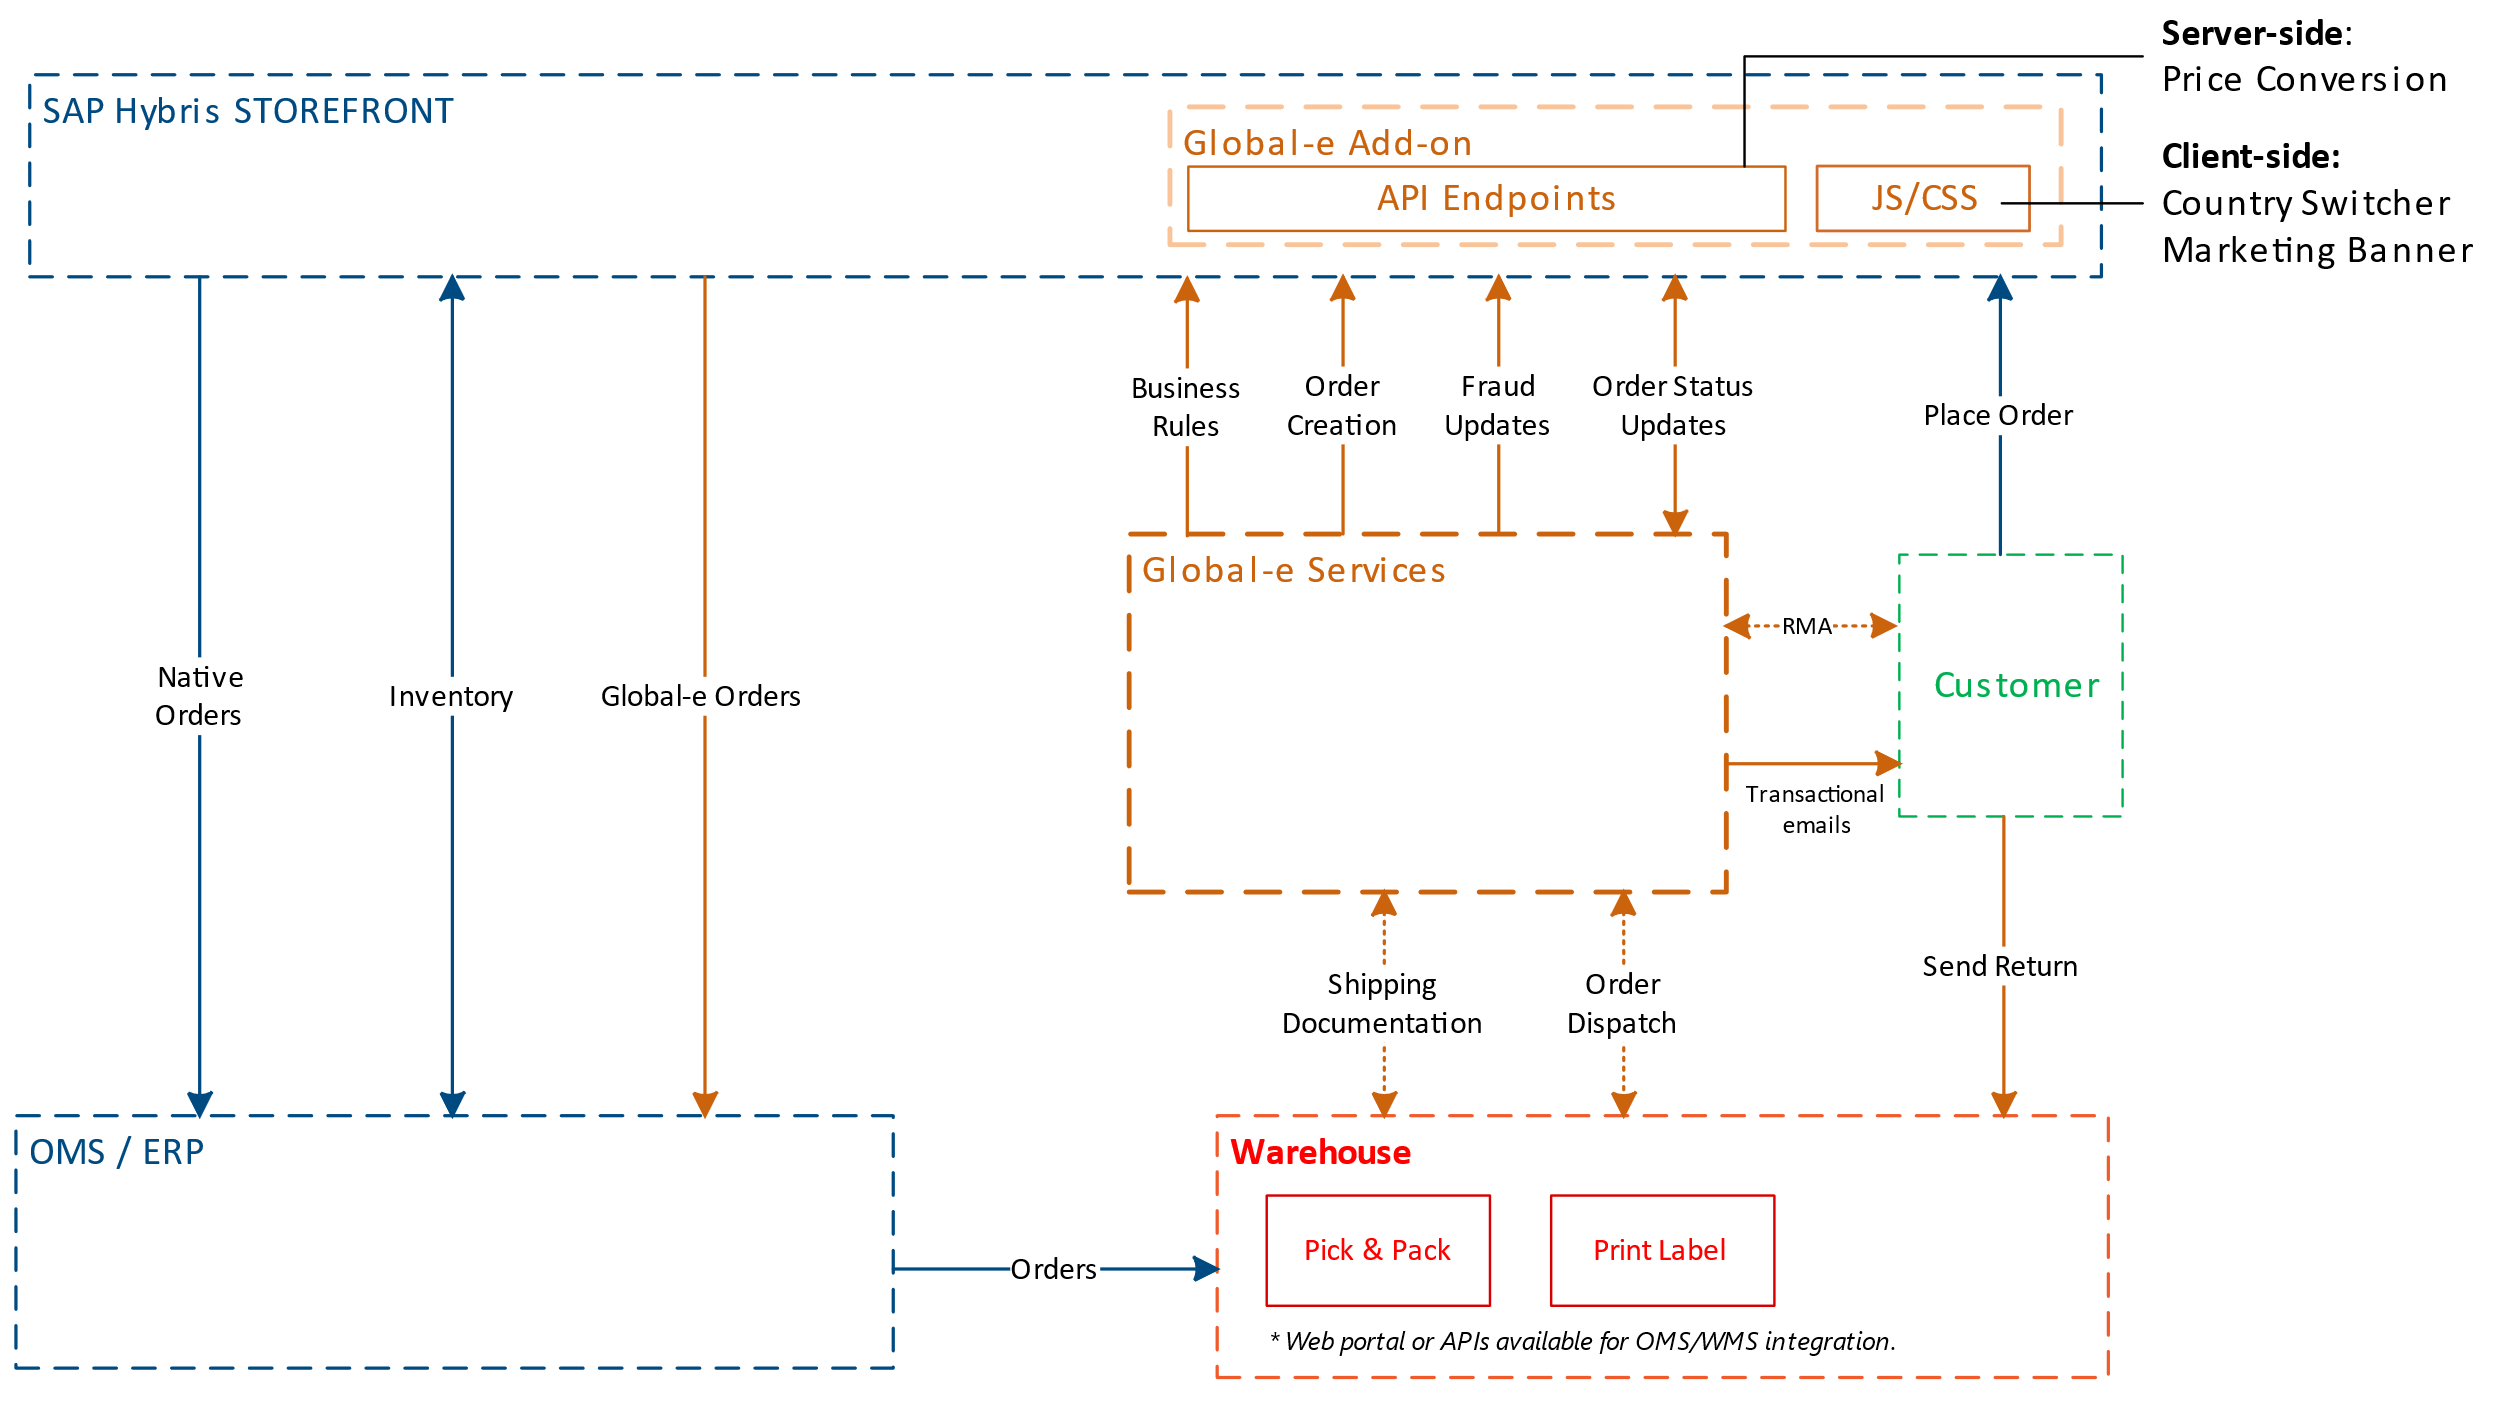
Global‑e Hybris Order and Checkout Flow
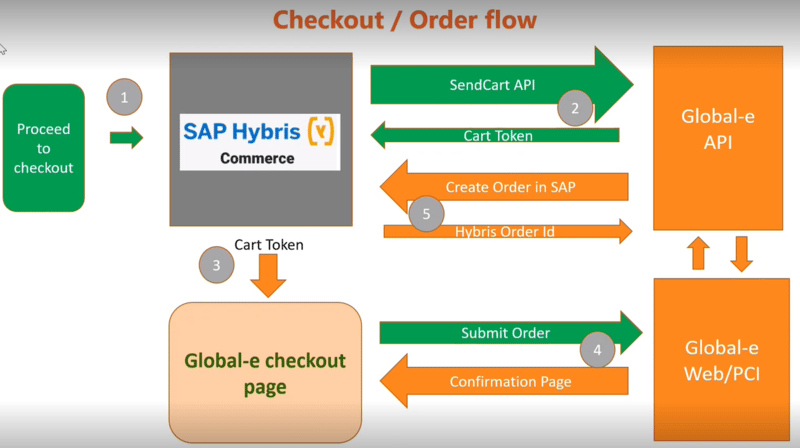
- When a customer proceeds to checkout (1), Global-e verifies if the selected shipping country is operated by Global-e.
- If operated by Global‑e, the SentCart API is used to send all relevant information about the products and customer details to Global‑e (2).
- Subsequently, Global‑e creates a cart on the Global‑e side and returns the cart token to SAP Commerce (Hybris).
- Global‑e uses this cart token to initiate the checkout process (3).
- Global‑e then makes a server-to-server API call to SAP, triggering the creation of an order on the SAP Ecommerce (Hybris) side (4,5).
Scripts
The following Global‑e scripts are installed.- Global‑e CSS
- The JavaScript code is installed on all site pages and the Checkout Page.